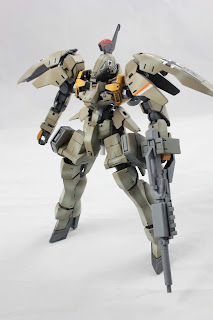
Posts

Showing posts from 2020

Extreme Squad Lupus

Image
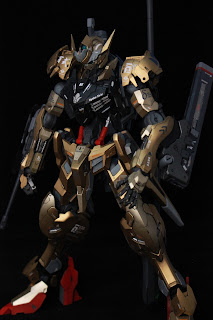
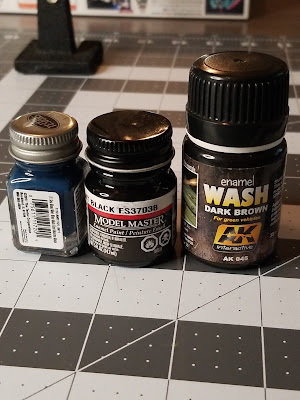
My painted build of the Extreme Squad Lupus conversion for FM barbatos. This was an excellent quality kit. The molding is crisp and details are beautifully rendered in soft, sandable resin. It was de-nubbed easily and with minimal dust by method of wet sanding under running water. I prepared the surface by sanding with 400, then 800, then 1000 grit sanding sponge. Then primed with Mr. Surfacer 1000. There were a few spots that should have been fixed with putty but I missed them at the time. A lesson for next time. Several parts had difficulty retaining paint, chipping down to bare resin after masking several times. (Side skirts, sheathes, and shoulders.) I eventually got paint to stick to these parts using a very thin putty as a tack coat. List of paints used: Gold 1 (light): Gaianotes EX Gold Gold 2: Tamiya TS-23 of which I decanted 40 ml then added 5 drops of clear yellow lacquer (Gaia) Grey 1: NAZCA mechanical surfacer Grey 2: NAZCA super heavy surfacer Metal 1 (grey): Trucolor grap

A Gundam builder's guide to IPMS

Image
I've been building models for over 10 years now and competing for close to 5. In that time I've learned some hard, painful lessons but I've also made some of the best friends of my life. Competing in model building is a very unique and rewarding experience and I hope to better equip you for what is to come! I want to take a moment to say thank you to those of you support me on  Patreon ! If you're not subscribed yet, go check it out and consider signing up for as little as 1$ per month. I raffle off some of my completed works once per year and take tutorial requests from all patrons! It seems to me that the dudes who spend their time gluing bits of plastic together to make model robots should have a lot in common with the dudes who glue bits of plastic together to make model planes and tanks. But walk around the sci-fi sectiont at an IPMS show and you’ll almost certainly hear someone complaining that “these IPMS guys just don’t know what they’re doing whe

Guide for beginners: Gunpla build process

Image
If you are a total beginner in this hobby you may have trouble visualizing the build process in total. The amount of steps and the order that you must do them in can be overwhelming. Let's take a deeper look into each of the steps and why they are done in the order that they are. I made a handy flow chart to help you see where you are in your own build process. If you're lost just think about what you did last and follow the arrow! Black arrows denote the next step, blue arrows denote a choice, green arrows denote do this if you haven't already. Whether you decide to do a fully painted build or just a casual snap, the first step is always to inspect the kit. Are all the parts present and in good condition? Is the manual undamaged? A cursory glance over your components may save you the trouble of having to return an opened and partially started kit. Reputable hobby shops will always take returns on kits missing parts but they may not take something half b

Graze Ritter and Hobby1Japan competition

Image
Heres a quick build I did for a local comp. Paint scheme inspiration from maschinen krieger and Akrikorps armor. I added some bright colors and decals to modulate and tried some 'eavy metal style chips and scratches. And here are the competitors. We had an amazing turnout this time! The quality of builds is definitely going up. Seriously proud of the local community. You guys killed it 👌

Guide for beginners: Panel wash

Image
Panel Lining Adding color to the recessed details of your models brings a sense of depth and reveals details that would get drowned out in small scale. Some choose to do this with pencils or markers, others paint. Some use a very thinned down paint which easily runs into crevasses all by itself. This thin paint is called a wash. We can make a wash with any kind of paint but due to interaction with the base coat the most common choice is Enamel. As we already know, enamel paint does not react with either acrylic or lacquer. This makes it perfect for washing our model's details. Let's look at how it works: We start with enamel paint. Any brand is fine. Oil paint can also be used but be aware that the dry time will be days if not weeks. If using oil paint we will top coat with a lacquer to speed the drying time and prevent smudging of the colors. Next we thin the paint until it is almost transparent. We can test the consistency br dragging the paint