Posts

Showing posts from 2019

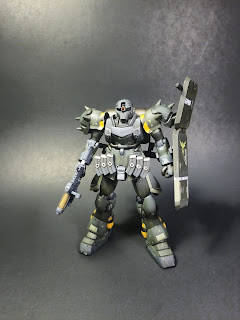
Grimoire Gouf Custom

Image
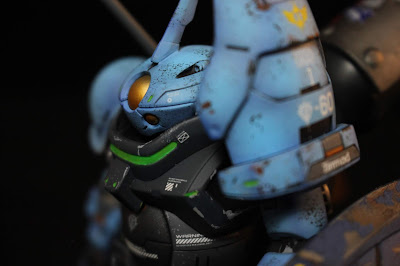
MS-07B Grimoire An HG kitbash presented in 1/100 scale. Kits used: HG Grimoire, HG Zaku F2000, HG Black Tri-stars Zaku Origin ver, HG Geara Zulu Angelo Sauper ver, MG Zaku 2.0, HG Hyakuren, HG build campaign parts. I built this kit with a fun goal in mind. Can I make a Grimoire look like a Gouf custom without using any of it's parts? The answer is a resounding yes! Although some artistic license is taken with the design, most Gundam fans could easily identify which grunt suit this little guy is cosplaying as. I dropped some design elements of the Gouf that I really don't like such as the shoulder spikes and energy cables. I usually like cabling on Zeon MS quite a lot but for some reason the way they are placed on the Gouf really irks me. A 1/100 scale command fin is used to match the size of the Grimoire head and really underscore the commander suit vibe. I grafted a Zaku 1 round shoulder onto the stock piece to give a nice Zeon suit look. 

Guide for Beginners: Seam Fixing

Image
Seam lines are the second most problematic fix on most kits – right after nub marks. Whether painted or not, a seam line running down the middle of a part completely ruins the sense of scale and immersion. Fixing these things is a royal pain so I've come up with a sledgehammer method to make sure it gets done the first time. More modern kits are often engineered in such a way that part joints are covered by other parts or assembled in such a way as to make the joint look like a natural part of the model. That said, they’re still present on many cheaper kits – especially SDs, HGs, and NGs. Your loving design team at Bandai spent their budget on RGs, MGs and PGs. As such, seam line removal is a skill that will always be useful in modeling. You may be asking, why would I even do this? The answer is that seam fixing is one of the cornerstones of competitive model building. In competitions that use a derivative of the IPMS standard you will lose a point for each unfixed line. This

Geara Zaku

Image
I started this build with the goal of learning more about the practical use of panel scribing and placement. I've been practicing carving my own lines with every tool you can imagine for years but the "golden mean" for placing them properly has always eluded me. This time around I focused very intently on creating details with purpose, that is I decided what a detail would be before I started modifying my kit. I know it sounds obvious but this epiphany completely opened my eyes to what this discipline should actually be used for, creating hatches, panels, and recesses. I believe what I was able to create with this new knowledge is both more realistic and aesthetically pleasing. Along the way this build also became a test of my ability to conform to the IPMS build standard. Seams were obsessively filled, holes were drilled to uniform depth, weathering was applied with balance between subsections in mind. The build portion has always been my weakest and I'm